About My Craft
I use a special 5-ply mahogany plywood, which allows me to cut intricate pieces that will not break if dropped. The puzzles are packaged (disassembled), in a sturdy box -- but with no picture! Assembling a puzzle without knowing what it looks like adds to the enjoyment of discovery as the final image comes together.
Figure Pieces

In each jigsaw puzzle I cut some “figure pieces” -- pieces shaped like animals, people, etc. Often a figure piece will be related to the scene. In the following underwater scene, notice not only the shark figure piece, but the shark is chasing a scuba diver!

Sometimes I’ll make figure pieces that “interact” with each other in a little scene – each piece is a figure by itself, but when they are put into place they form a little scene. Other times I’ll make a large figure and then cut it into smaller pieces; at first the assembler doesn’t realize that the pieces form a figure piece. I have a range of “stock” figure piece patterns that I can easily re-use, but I also will make up new ones if I think it makes sense for the puzzle. For an extra fee I can make custom figure pieces that are personal to the puzzle recipient, like a home state, college logo, etc. And of course I can cut names or initials.

Irregular Outlines
I like to use prints that I think are ideal for cutting an irregular outline. Most puzzle assemblers like to look for straight edge pieces, but in my puzzles there might not be any straight edges at all. Or, if I think it makes sense for the image, I’ll purposefully cut mostly straight edges to lull the assembler into thinking that the puzzle is rectangular, but then make just part of the edge irregular, or have “bump-outs” along the edge, as shown here:


When doing an edge bump-out, I’m actually pulling in the edge of the original print (sometimes keeping it straight, other times making it non-straight but still a recognizable repeating pattern), to the point where a part of the foreground image sticks out of the new-located edge. Ideally I’ll also color-line cut around that image part so that when the assembler is looking for edge pieces (even if they are non-straight), they will have no clue that the bump-out is what goes between the two adjacent edge pieces. Yes, I am a bit devilish :-).
Figure pieces can sometimes poke out of an edge. This was a photograph of a volleyball team:

These numbers symbolize the thoughts in this busy accountant's head:

This swordfish and crab are sticking out from the edge of an tropical underwater scene:


Dropouts
If the scene is one that lets me do a completely irregular outline, cutting around the objects in the foreground (i.e., essentially leaving out the background), then if the background also shows up in interior parts of the puzzle, it makes sense to drop out those interior parts. This technique produces an unexpected tricky problem for the assembler If the interior background being dropped out is in multiple tiny areas, much smaller than individual pieces (think sky showing through tree leaves), the pieces around those tiny drop-outs are extremely tricky to assemble (which I think is great, of course).

One special technique I like to do is what I call “sliver dropouts”, which are thin sections of the puzzle that are cut out and not included in the puzzle. Each sliver dropout might not make a recognizable shape by itself, but in combination with other carefully-placed sliver dropouts a larger image is formed. It is difficult to find pieces that connect near a sliver dropout because of the missing wood. And even when the first-time assembler realizes that part of the wood is missing, they won’t realize the shape that the sliver dropouts create until most of the rest of the pieces in that area are put into place. It is wonderfully satisfying when I can watch friends reach that “Aha!” moment as they get the final pieces in place and see the shape formed by sliver dropouts.


Styles
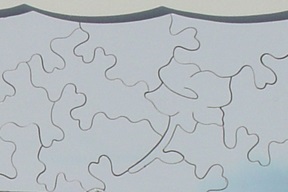
I can cut many styles of pieces, but the main style I cut most often is something I call my “dancing feet” style (they look a little like lots of dancing legs and feet). It is a style I just naturally came up with after trying to imitate some cutting styles of the 1930’s, in particular Arteno Puzzles. I can make a puzzle in this style easy or difficult by giving each piece more or fewer “legs”.

I think my curl style is the most beautiful, and it adds a “soft” atmosphere to the scene. A puzzle in this style can be difficult but very satisfying to assemble. This style does not work well in small puzzles (or ones where lots of color-line cutting of small sections is desired), though, because I need more room to let the curls flow freely.

Variations of the “classic” or “earlet” style is used by most modern-day cutters. The pieces are more “blocky” than my dancing feet or curl pieces, giving the puzzle a more traditional feel, but it still is far better than the style of grid-based cardboard puzzles. If I’m cutting a romantic or wedding-based puzzle, I’ll often use this style and stretch the knobs a bit so that they look like hearts.


After cutting the jigsaw puzzle, I count the pieces, assemble the puzzle, and sand the back to give it smooth texture.